PublishedOct 13, 20203 min read
How To Create A README For GitHub Profile
GitHub released a feature that lets you display a README prominently on your profile. This gets you through every step and requirement of a profile README.
- GitHub
- Markdown
- Career
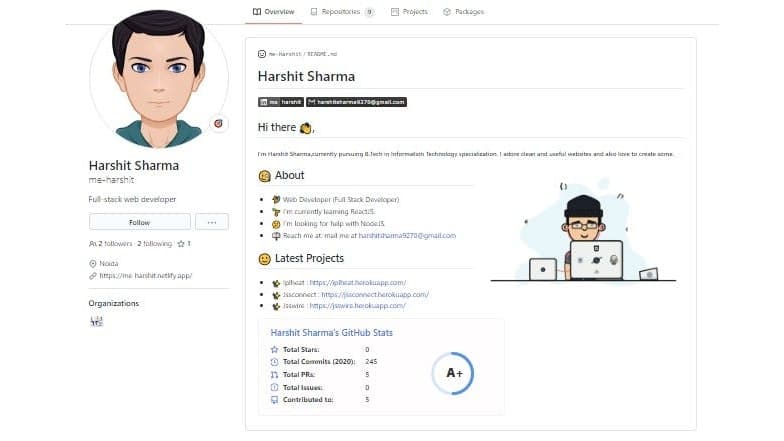
GitHub recently released a feature that allows users to create a README to display prominently on their GitHub profile. This article will get you through all the steps and requirements of a README for a GitHub profile.
The header image above shows what my README looks like at the time of this writing.
Why READMEs for a profile?
The GitHub profile README feature allows you to showcase more content than the profile bio, and it supports markdown — which means you can style it however you wish. For brushing up your markdown knowledge you can refer to a markdown cheatsheet.
READMEs make your profile more visually appealing, as they let you add GIFs and images as you please.
How do I create a profile README?
The profile README is created by creating a new repository with the same name as your username. For instance, my GitHub username is me-harshit, so I created a new repository with the name me-harshit.
Letter-casing has to match
In order to access the profile README feature, the letter-casing of the repository name must match your GitHub username exactly.
You can also showcase your GitHub perks using third-party projects like github-readme-stats. With it you can present your GitHub stats in a much more professional way.
- 1
Create the repository
Create a new repository with the same name as your GitHub username, at github.com/new.
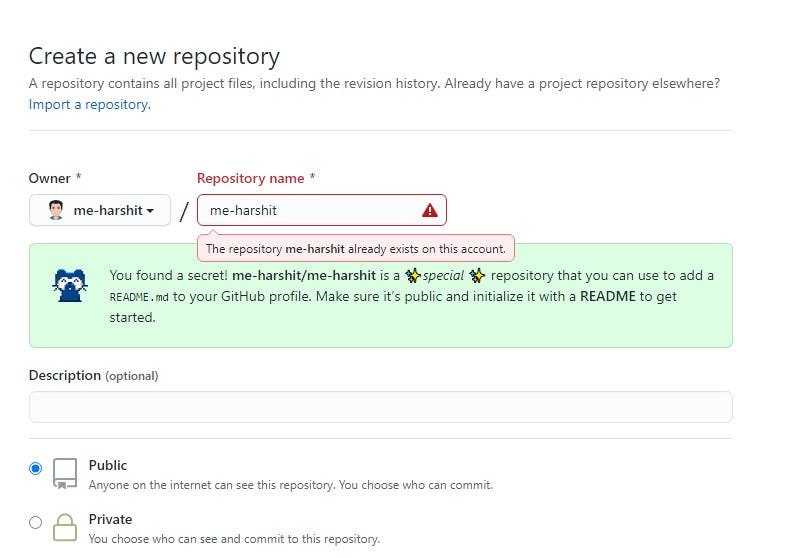
Initialise a repository with the name same as your username, including casing - 2
Add a README
Create a
README.mdfile inside this new repo with whatever content you want — text, GIFs, images, emojis.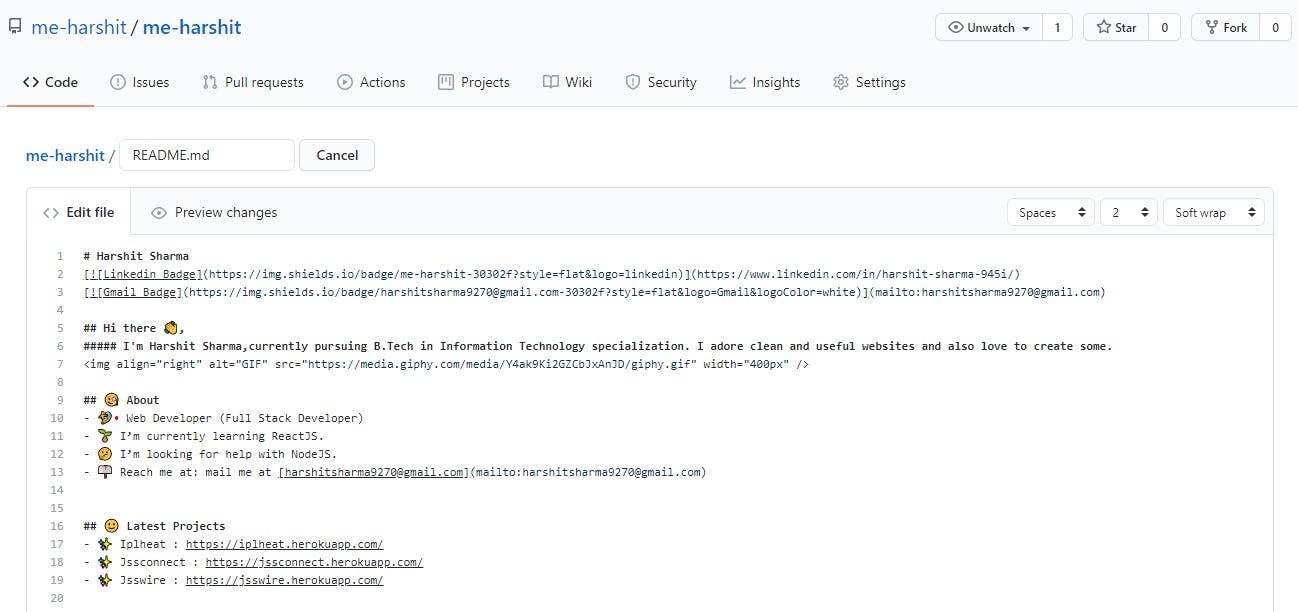
Sample README - 3
Commit your cool new README
If you are in GitHub's web interface you can commit directly to the repo's branch (
masterormain), and it is immediately displayed on your profile. - 4
Push the changes
Push your changes to GitHub, if you made them locally on your computer.
Now have a blast. Share your profile README with me — I'd be more than happy to have a look. If you like it, consider giving it a star.